Showing posts with label Recipes. Show all posts

Saturday, January 7, 2012

Pinterest Food Roundup

Thanks to Pinterest we've been eating some especially delicious foods lately and I thought it was time to share a list of food I've been making .

We'll start with the Autumn Chopped Salad

I actually made a salad very similar to this before I saw the pin but they made a couple changes I was intrigued by.  My salad was crisp lettuce, toasted pecans, craisens, Parmesan, feta cheese and a little poppy seed dressing to finish it off.  They skipped the Parmesan but they added pears, bacon and a splash of balsamic vinaigrette.   Now the bacon I thought was unnecessary but the pears and vinaigrette were both salad changing and definitely made it into the usual recipe.  This makes a delicious dinner and would be great at a potluck.

Jalapeno Poppers
Who doesn't love jalapeno poppers?

I'm not super wild about the store bought ones though, something about the breading.  These looked so yummy I thought I'd try them and they did not disappoint, I'd make them again in a heartbeat.  You simply take Pillsbury crescent rolls, cut each one in half and then put a blob of cream cheese, a chunk of a jalapeno and top with a bit of cooked bacon.  Fold them up and bake.  I made one change that I recommend though, these poppers only cook for 10 to 15 minutes which to me meant I was going to have crunchy jalapenos and sure enough someone mentioned that in the comments.  Before I cut up my peppers I threw them in the oven to bake until they were slightly tender.  Also, again both Brad and I thought the bacon was in the way here.  We didn't like the texture of it and I would skip it next time.  Now that's two recipes in a row where I've nixed the bacon so let me just mention that I do really love bacon I just don't think it's needs to be thrown into just anything.

Skinny Baked Potato Soup

This isn't actually a recipe that I made but a friend of mine did and it was awesome.  It uses a whole head of cauliflower to make it a little better for you and I loved it.

Braided Spaghetti Bread


This recipe was actually emailed to me, I didn't find it on Pinterest but of course it's there.  It was so good it deserves two pictures.  You take bread dough and roll it out like you would cinnamon rolls, spread it with garlic olive oil (or butter).  In the centre lay some spaghetti in sauce, top with mozzarella cheese and braid it up.  This was awesome.  Garlic bread and spaghetti together, so good.  Make it tonight.

Better than Olive Garden Zuppa Toscana

Everyone loves the Olive Garden right?  What's not to love so most of you have probably had their Zuppa Toscana soup.  It's a soup with potatoes, sausage and kale among other things.

I'll be the first to admit that this soup is not good for you but it was so amazing we couldn't stop raving about it.  I served it with crusty baguette and don't you dare skip the bread, it was the best part.  Now as much as we loved this soup I would make some changes next time, it had far too much sausage, I'd use half the amount and add extra potatoes.  Also, I could have used more kale so I'll make those changes next time as there will certainly be a next time.

Kung Pao Ramen Noodles
I watched this movie not that long ago called Ramen Girl, now don't rush out and watch it because it really wasn't very good but the entire movie is about the process of making ramen which made me crave it something fierce.  I did a quick Pinterest search and found a bunch of yummy looking variations and this was the one I started with.  It was awesome and easy.

White Chicken Enchiladas

For Christmas dinner this year my Mother in law made white enchiladas and I loved them and wanted more and then I came across this recipe which I loved since it doesn't include any cream of anything soup.  I do think her amounts are a little off though, there's no way her recipe called for enough cheese, I think I doubled it and I didn't fill nearly as many tortillas as she said too.  Also I discovered that I hate leftover enchiladas so next time I'd make a teeny tiny pan of these.  They were awesome the first night though.

Chicken Broccoli Supreme

Here's another no cream of anything soup. It can be tough to find casseroles that don't use a can of nasty stuff but this is a good one.  Now not good for you at all as it's topped with buttered Ritz crackers but it's super yummy and pretty.

Cheesy Bacon Pull Apart Bread

While I was down at my sister's house we went to a potluck so I made this and it was delicious and gone quickly.  Just don't make mistake, make sure your rolls don't thaw too much before you use them.  Mine was much more difficult to make than it should have been.

Pizza Bites

Oh how I love these.  A tiny ball of dough with two slices of pepperoni and a square of mozzarella tucked inside.  You stick them in a pie plate and serve with yummy sauce for dipping, so delicious.

Buffalo Chicken Bites

One last recipe and these I actually haven't tried yet, they're on the menu for dinner tonight and I have high hopes.


So there you have it a handful of tried and tested really delicious meals.  You should incorporate some into your week.  I don't know where you live but today where I live it's a perfect day for Zuppa Toscana.

Monday, November 14, 2011

Yummy Salad

Sometimes you manage to do something right in the kitchen and this salad is definitely right.

We've named it, That Yummy salad and we can't quite get enough of it.  If it's a side to the meal it steals the show, if it's the main course seconds are necessary.  It's a salad so it's really easy and I figured it was time for me to share it with all of you.

First up, your ingredients.  Some green leaf lettuce (hopefully less sad than mine was), crumbled feta cheese, grated Parmesan cheese (not that crappy powdered stuff, you need some good parmigiano reggiano), craisins, poppyseed dressing and some toasted pecans.  For this salad I went the extra mile and candied the pecans. I knew they would be good and I knew they'd make the salad better but I had no idea how salad changing they would be.  I'm not sure I'd make the salad without them now.  I used this recipe to candy them and I highly recommend it.

We ate this for dinner and since it was just Brad and I eating I ended up using half of all the ingredients you see below.  If you used the full amount it would make a salad big enough for 4.  So the key to this salad is lots of toppings and just a little dressing.  Be liberal with the toppings and show restraint with the dressing, just a light coating is all you need.  As you can see in picture number 4 it barely looks dressed but trust me when I say it's plenty.  


I served this with homemade bread sticks and it was a delicious meal.  If you wanted you could add some chicken to the salad but we don't usually think it's necessary.

So go ahead, make your own Yummy Salad.

Friday, May 20, 2011

Our Best Bites

I may not be doing a lot of crafting these days but one thing I am doing is cooking.


I think it was January when I decided I wanted a new cook book.  I'd been cooking one new recipe a week and was tired of searching the internet all the time, I wanted to be able to open a book from my cupboard and find something new and exciting.  I looked around a bit and then I discovered the Our Best Bites website.  I cooked from there for a while until they announced they were releasing a cook book and I knew that was what I wanted.

I've cooked a bunch of recipes from the book now and there isn't one I don't love.  I thought I'd let you know what I've made and a link to the recipe's they've posted online.


Glazed-Bacon Wrapped Meatloaf
This is just as awesome as it sounds, meatloaf wrapped in bacon.  I especially love that this isn't a ketchup based meatloaf.


We served this with roasted potatoes and my favorite Oven-Roasted Balsamic Brussel Sprouts.


French Dip Sandwiches


These were so delicious and super easy.  Who would have thought to put Swiss cheese on a beef dip?  So yummy and happy I made it.


Taco Chicken

I can't stop craving these taco salads.  The chicken is crazy easy and don't you dare skip this dressing, it's incredible.  Turns a regular taco salad into so much more. Creamy Lime-Cilantro Dressing

Then there was the Mexican-Style Sweet Shredded Pork that is just as crave able, sadly this recipe isn't online and perhaps I shouldn't but the recipe is so good I'm giving it to you here (sorry there's no photo).

4 lb boneless pork shoulder roast
1/2 tsp kosher salt
1/4 tsp black pepper
2 tsp chilli powder
1 tsp onion powder
1-2 tbsp vegetable oil
2 (10 oz) cans enchilada sauce
1 cup brown sugar, divided
1/2 cup salsa
1/2 tsp Worcestershire sauce
1/4 cup apple juice

1. Trim visible fat from roast and sprinkle with salt, pepper, chili powder and onion powder, massage into meat.
2. Using the oil sear pork roast on all sides until golden brown
3.  While meat is searing, combine the enchilada sauce, 2/3 cup brown sugar, salsa, Worcestershire sauce, and apple juice in slow-cooker.  Add the pork, cover and cook on low for 7 hours with lid on the entire time.
4. remove pork and shred, discarding any pieces of fat.  Add the additional 1/3 cup brown sugar to slow cooker and turn heat to high.  Add shredded meat, simmer with lid off for 30 minutes.


I served this with Lime-Cilantro Rice with Pineapple

 Pico de Gallo
Tortilla chips, my favourite Cilantro-Lime Dressing and avocado.  It was incredible only I couldn't find enchilada sauce so I made my own.  I'm at my in-laws still so I used the chilli powder that I found and it turned out to be insanely spicy.  I look forward to the next, toned down version.


Last there are the recipes that aren't in the book that I won't share with you:
Italian Chicken and Vegetable Skewers
Spinach-Chicken Stromboli  (oh man I loved this)
Oven-Roasted Broccoli


These are just a sampling of the yummy recipes found in the book, there are still a bunch more I'm excited to make.  It's awesome and I highly recommend it, you should buy a copy.

Tuesday, April 5, 2011

Cream Cheese Ice Cream

3 food posts in a row, sorry if I'm overdoing it but this is what I've been up to lately.


I read a blog called The Gourmet Project where Teena is cooking her way through The Gourmet Cookbook.  I love the blog and since she's getting close to the end of the book most of the food is strange.  It's fun to see what she cooks but my favourite part is when she finishes a chapter she'll list her favourite recipes. 


Recently she finished the Frozen Desserts and Sweet Sauces and she listed Cream Cheese Ice Cream as a favourite,  I thought it sounded like a brilliant idea.  She didn't give a recipe so I Googled and used this one.

Cream Cheese Ice Cream

8 oz cream cheese, softened
1 cup milk
1 tablespoon fresh lemon juice
3/4 cup sugar
1/8 teaspoon salt
1/2 cup heavy cream

Blend cream cheese, milk, lemon juice, sugar, and salt in a blender until smooth. Transfer to a bowl, then stir in cream. Freeze cream cheese mixture in ice cream maker. Transfer to an airtight container and put in freezer to harden, at least 2 hours. Let ice cream soften 5 minutes before serving.


It turned out delicious and I'm sorry I haven't tasted it earlier.


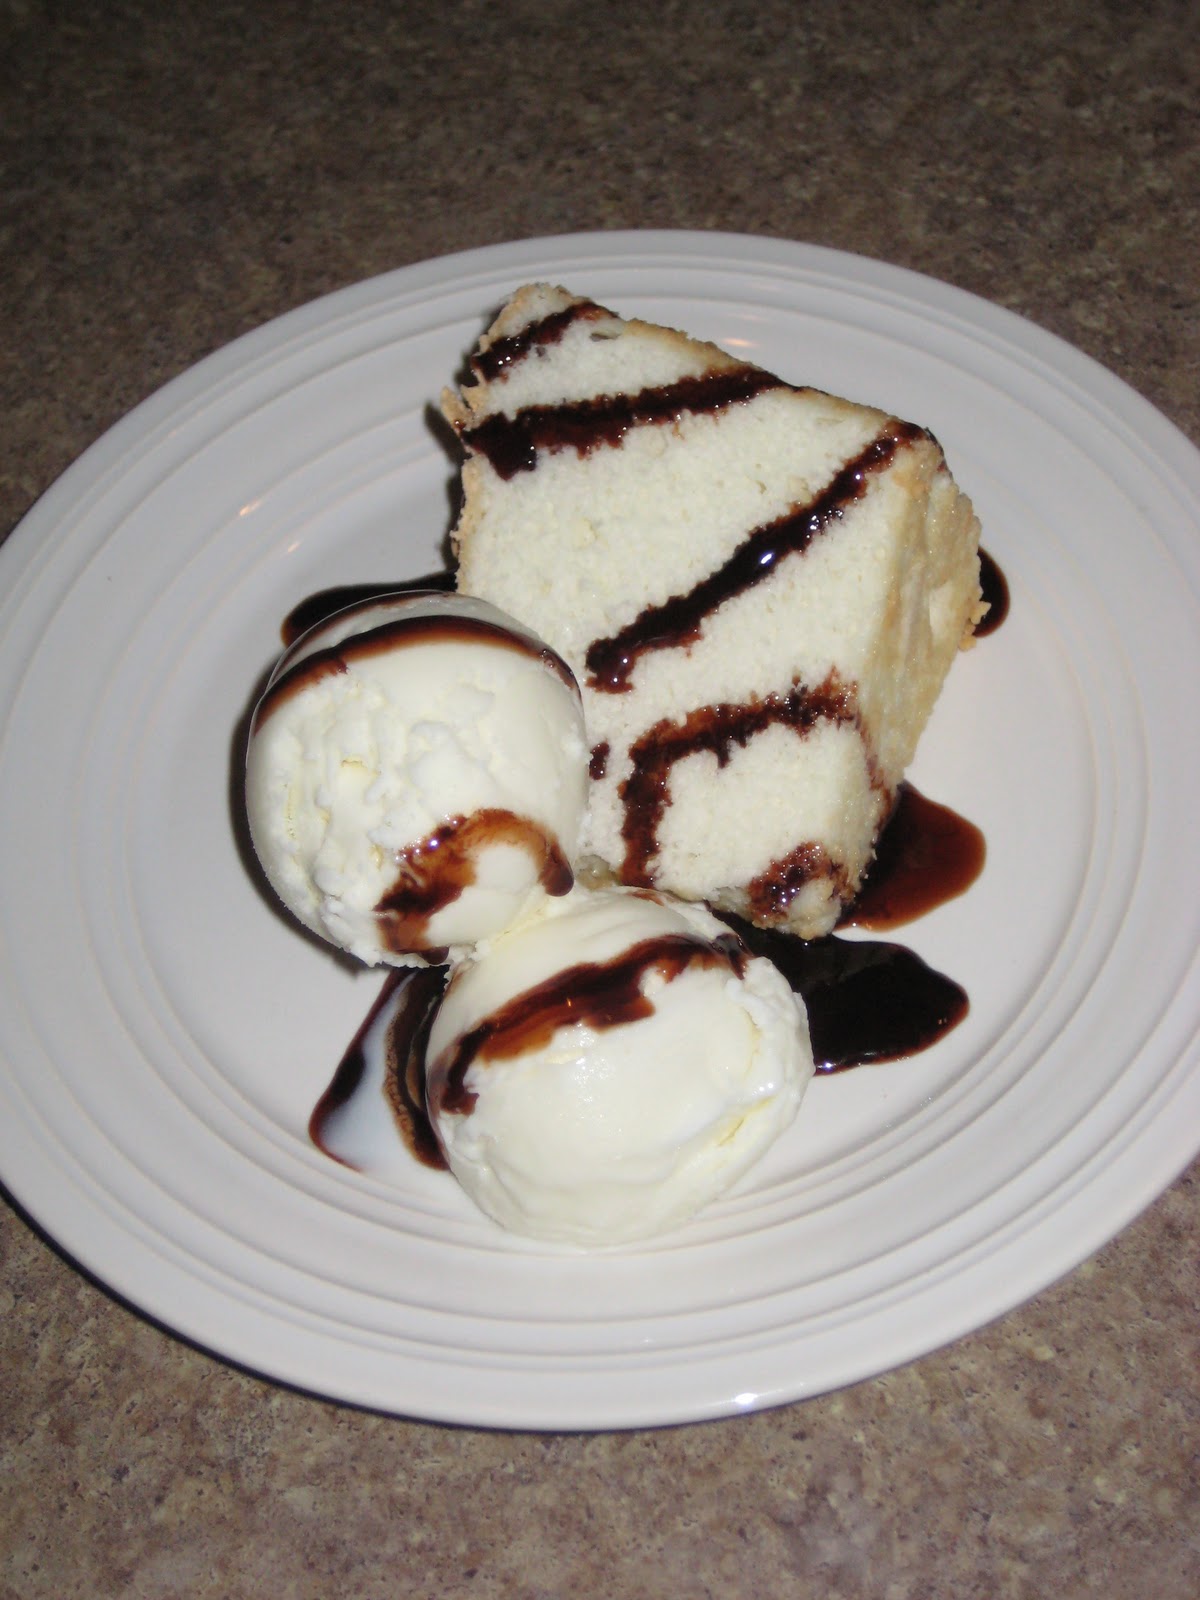
We ate it with angel food cake and a little chocolate sauce though I felt like the ice cream out shined everything else.  It's lovely and tangy and not overly sweet, try it and I bet you'll like it too.

Thursday, February 3, 2011

New Food Friday - Taquitos

In case you're new around here, New Food Friday is where I try a new meal and then report back on the success or failure.  I'd love if you'd join me but since there were no entries and linky tools isn't free anymore I'm dropping the linky.  Feel free to leave me a comment and tell me about your new recipe, I'd love to come back to your blog and check it out.

Since I've started making a new recipe a week we've eaten a lot of meals that were very blah, hardly worth mentioning but since I started recording them I've had some great successes.  I generally have low expectations of the new meals but for some reason I expected greatness of this meal and I definitely got it.  So yummy that we're going to eat them again tomorrow.


Baked Creamy Chicken Taquitos
1/3 C (3 oz) cream cheese
1/4 C green salsa
1T fresh lime juice
1/2 t cumin
1 t chili powder
1/2 t onion powder
1/4 t granulated garlic, or garlic powder
3 T chopped cilantro
2 T sliced green onions
2 C shredded cooked chicken (for extra yumminess, use grilled taco chicken!)
1 C grated pepperjack cheese

small corn tortillas (I used flour)
kosher salt
cooking spray

Heat oven to 425. Line a baking sheet with foil and lightly coat with cooking spray.

Heat cream cheese in the microwave for about 20-30 seconds so it's soft and easy to stir. Add green salsa, lime juice, cumin, chili powder, onion powder and granulated garlic. Stir to combine and then add cilantro and green onions. Add chicken and cheese and combine well.

You can prepare up to this step ahead of time. Just keep the mixture in the fridge.

Work with a few tortillas at a time and heat in the microwave until they are soft enough to roll without cracking. It helps to place them between damp paper towels. Usually 20-30 seconds will do it. If you find yours are cracking when you roll them or are coming unrolled right away, just try heating them longer and try the paper towel thing.

Place 2-3 T of chicken mixture on the lower third of a tortilla, keeping it about 1/2 inch from the edges.

Then roll it up as tight as you can.

Place seam side down on the baking sheet. Lay all of the taquitos on the baking sheet and make sure they are not touching each other. Spray the tops lightly with cooking spray or an oil mister and sprinkle some kosher salt on top.

Place pan in oven and bake for 15-20 minutes or until crisp and the ends start to get golden brown.


I wouldn't change anything about this meal except perhaps to follow her directions.  We used large tortillas, not small ones and you can see the edges were pretty brown but the middle wasn't.  The filling was very hot all the way through but the browning was uneven, I really should have used the small tortillas like she says too.  I also thought when I wrapped them up that the ends looked really empty so I stuffed some extra filling in only to have it bubble out while cooking so don't worry if you have empty ends, they'll fill up.


I got this recipe from a site called Our Best Bites and you can find the original with photos and a tutorial here.  This site is my new favorite and you'll probably see a couple recipes from here in the next little bit, everything looks delicious.  They recommend serving the taquitos with a Creamy-Lime Cilantro Dressing that sounds yummy and I would have made but I didn't have all the ingredients on hand.

Thursday, January 27, 2011

Apple Roll Up

This is a dish that my Mom made the other night.  She said it was delicious and wanted to link up to New Food Friday but she doesn't have a blog.  I said I'd share it with you so here is a yummy apple recipe.

Apple Roll-up
2 cups all purpose flour
1 tsp baking powder
1/2 tsp salt
6 tbsp butter or margarine
3/4 cups  milk
4 cups cooking apples, peeled, cored and chopped
2  cups water
11/2 cups granulated sugar
butter or margarine to dot
cinnamon and sugar to sprinkle

Vanilla ice cream

Measure first 4 ingredients into a bowl.  Cut the butter until crumbly.  Add the milk and mix to form a ball of dough.  Don't mix too much.

Roll out 1/4 inch thick in a rectangle about 9x12 in. in size.
Spread apple over dough.  Roll out from the short end   (I rolled from the long side to make more slices)

Boil water and first amount of sugar in small saucepan slowly for 5 min.  Pour into a 9x12 pan.

Cut roll in 1 1/2 inch thick slices.  Lay slices cut side down in the syrup.

Dot with butter.  Combine sugar and cinnamon and sprinkle over the top.
Bake at 450 for about 25 min. until apples are tender.  (I found they needed about 10 more min.)

Serve hot with ice cream.  Made 8 rolls.

Doesn't this sound so yummy!  I think I'll have to try them. 
Sadly Mom left her camera in Utah so there's no picture of these.  If you make them you should send me one.

Friday, January 21, 2011

New Food Friday - Roadhouse Pizza

Two weeks ago I issued a challenge to spice up your menu, cook a new recipe and share it here... sadly it seems I'm the only one interested.  Whether you join me or not I'm going to continue with the new recipes so I may as well blog about them.  I'll continue with my sad little linky parties just in case someone decides to join but if no one does it's okay, I'll carry on anyway.

We love pizza in our house, whether it's homemade or take out we love it all so I make it fairly often.  This week I decided to re-create a pizza we like to order out, it's called the Roadhouse and it's from Two Guys and a Pizza Place.  I also tried a new crust recipe, the one I used in the past is not great but it's probably the 1st and only dough recipe I used.  I figured it was time for a new one.


Roadhouse Pizza

Pizza Crust
2 1/4 tsp active dry yeast
1/2 tsp brown sugar
1 1/2 cups warm water
1 tsp salt
2 Tbsp olive oil
3 1/3 cups all-purpose flour

1. In a large bowl, dissolve the yeast and brown sugar in the water, and let sit for 10 minutes.
2. Stir the salt and oil into the yeast solution. Mix in 2 1/2 cups of the flour.
3. Turn dough out onto a clean, well floured surface, and knead in more flour until the dough is no longer sticky. Place the dough into a well oiled bowl, and cover with a cloth. Let the dough rise until double; this should take about 1 hour. Punch down the dough, and form a tight ball. Allow the dough to relax for a minute before rolling out. Use for your favorite pizza recipe.
4. Preheat oven to 425 degrees F (220 degrees C). If you are baking the dough on a pizza stone, you may place your toppings on the dough, and bake immediately. If you are baking your pizza in a pan, lightly oil the pan, and let the dough rise for 15 or 20 minutes before topping and baking it.
5. Bake pizza in preheated oven, until the cheese and crust are golden brown, about 15 to 20 minutes.


For our toppings I started with a sauce of Ranch dressing.  Then I added cooked, sliced chicken breast, red pepper, bacon and cheese.


This pizza was delicious and very close to the take out we order.  I wish the crust had been a little crispier but I probably could have cooked it slightly longer.  I also needed to use more dressing and more cheese.  I think in our house we tend to over due it with the cheese so I was trying to cut back and I got a little carried away, a tiny bit more would have been nice.


I'm calling this recipe a success and we'll probably make it again.


Friday, January 14, 2011

New Food Friday - Chicken Pot Pie

Okay, you've had your week to choose and make a new recipe, here's hoping I'm not the only one interested in the challenge.

This week I made a chicken pot pie.  I'm a little surprised that I haven't ever made one before and now I think it's a shame that it took me so long.  This recipe was delicious, one of those classics that I won't ever need a recipe for again.  The only change I made was leaving out the mushrooms since I hate them.  This was a real keeper that I'll make again and again, we felt so satisfied after the meal and the leftovers were just as delicious.  I think it would be super yummy with mashed potatoes on top instead of pastry some time.

 I hate mushy peas and I was really worried these ones would be overcooked but they were yummy.  The recipe says you may have to cover your pastry with foil to prevent over browning, I pulled my pie out 15 minutes early, covered it and put it back in because it was starting to brown too quickly.  I really appreciated that tip.
My version certainly didn't look as pretty as the one in the picture and for some reason my pastry did not turn out well but it was still tasty, just ignore the goo seeping on top (it was such delicious goo).

Chicken Pot Pie
1/4 cup butter
1/4 cup flour
salt & pepper to taste
2 tbsp finely chopped onion
3 cups chicken brother (I made my own from a store bought cooked chicken)
2 carrots, chopped in small pieces
2 celery stalks, chopped in small pieces
2 potatoes, cubed in small pieces
3 cups sliced mushrooms
2 tbsp butter
1/2 cup peas
3 cups cooked & diced chicken (I used the meat from the store bought chicken)
Pastry to cover 3-qt (3L) casserole or frozen puff pastry dough (I made my own even though it was not great)

Melt butter in large saucepan over medium heat.  blend in flour, salt, pepper and onion.  Gradually stir in chicken brother.  Cook, stirring constantly, until smooth and thickened.  Add carrots, celery and potatoes.  Cook until fork tender.  In a small frying pan, cook the mushrooms in butter.  Add mushrooms, peas and chicken to vegetable mixture.  Mix well and pour into large casserole.  Cover with rolled pastry and slash to allow steam to escape.  Bake in preheated 400F oven for about 45 minutes, or until pastry is golden.  If pastry becomes too brown, cover loosely with foil.


Now it's your turn, what new recipe did you cook?  Would you make it again?  What changes would you make and I'd love to see a picture.

Friday, January 7, 2011

New Food Friday - Lettuce Wraps

I like food.  Really good food.  I like to cook and eat yummy food but sometimes (and I hope I'm not alone here) I get stuck in food ruts.  I cook the same things each week or month and the really yummy food starts to seem ordinary and mundane.  In an effort to get out of this food rut I thought I'd try out a linky party.  Since this is the first week I don't expect a whole lot of participation but here's your warning for next week.

Here's how it works, this linky is all about new recipes.  I'm challenging you to try a brand new recipe every week.  Blog about it and then on Friday's you can come here and link up.  Tell us if you liked the recipe, what you liked about it, what you would change about it and if you would make it again.  Give us the recipe and a picture would be nice but not mandatory.

I've personally been doing this for a couple weeks, I've made some really good meals, some really blah meals and one really un-edible meal but I've loved the challenge.  It's made me go back through my recipe books and choose something I've been passing over for years.

Lettuce Wraps
This week's recipe was technically made for the first time last week but I made it again this week because we enjoyed it so much.  The only change I would make had nothing to do with the recipe, this is technically an appetizer.  We ate it for dinner and while it was lots of food we ended up not feeling satisfied.  The first time we ate this it was New Year's Eve and we had tons of appetizers so it was perfect, make it for an appetizer, not for dinner.


1 tsp cooking oil
1 Boneless, skinless chicken breast, diced into 1/2 " pieces (I used some shredded chicken I had in the freezer)
1/4 cup grated carrot
1/4 cup slivered onion
1 Tbsp slivered green pepper
1 Tbsp slivered orange pepper
1 Tbsp slivered red pepper
1/4 cup water
1 pkg Ichiban noodles (chicken) broken into 6 pieces
1/4 cup unsalted peanuts
1/2 Ichiban seasoning packet
1 Tbsp Hoisen Sauce
1 tsp liquid honey
1/8 tsp pepper
1/16 tsp chili powder
1/16 tsp garlic powder (I used a clove of garlic)
1/4 tsp hot pepper sauce
1 head Butter Lettuce

Heat oil on medium.  Add chicken, scramble fry until no longer pink.  Add carrots, onion and peppers.  Stir fry until veggies are tender-crisp.  Add water and noodles, stir.  Cover.  Simmer for 2 minutes until noodles are softened.
Add next 8 ingredients, stir until heated through.  Transfer to a small bowl, set bowl on platter and surround with lettuce leaves.  Have person spoon about 1/8 of chicken mixture into lettuce leaf.  Roll.
Makes about 8 wraps.

This recipe starts off so lovely and bright.
Here are my peppers all cut up.  Confession... I didn't notice how little of each colour pepper this recipe called for before I bought all three.  Had I noticed I probably would have stuck with one but I'm glad I didn't notice.  The three colours were so pretty and tasty.
My carrot and garlic grated together.
So for my chicken, like I said I used some shredded, cooked stuff I had in the freezer so I skipped the fry step.  Instead I started by frying my veggies.
Once they were tender-crisp I added my Ichiban.  Now the recipe says to break into 6 pieces but I really wanted it broken up a bit more, I'd do that next time (sorry the photo is sideways, I couldn't bear to fix it).
Once that was done I threw in my chicken and everything else and it looked yummy like this.
This looked much prettier on New Year's Eve when I put it on my Mother-in-law's platter but I had to make do with a cereal bowl and dinner plate this time.
To eat you take a lettuce leaf and fill it with the yummy stuff.
Wrap it up and eat.

This recipe was a huge hit and everybody was wowed by it.  I'm sure it would be the hit of whatever event you took it too.

Monday, December 13, 2010

Belgian Waffles - SAMM

Before I get to this yummy recipe you have to read through two stories.

I have this cool cast iron Belgian Waffle iron that my Mom gave me, I traded it to her for my electric iron (Belgian waffles have much deeper holes).  You set it on the stove, when one side is cooked you flip it over and cook the other. (Please don't judge the sorry state of my filthy stove)

I like the waffle iron so occasionally I make waffles but every time I've been disappointed and wondered if I should have kept my crappy electric one.  My waffles have come out dense and really not good.  It was probably the recipe but when I thought of making waffles I'd end up making pancakes instead.

Story two... I went to London once and it was awesome.  I shopped and saw Broadway shows and ate some really delicious food and while I was there it was the coldest winter in 10 years (or something like that).  One of my favorite memories is of walking down a cold street on our way to shop and finding a Belgian waffle vendor.  I bought a waffle and it was so warm and crisp and sweet and awesome that it's stuck with me 6 years later.

I've always had it in the back of my mind that I should make real Belgian waffles (they have yeast in them and have to rise) but I finally got around to it and now I'm kicking myself for not trying it sooner.  True, they have yeast so you have to let them rise for at least an hour but they bake up sweet, crisp and taste slightly like scones, they are delicious.  I've made them a couple times and we eat them for dinner since I'm not prepared enough to make them for breakfast, you could make the batter the night before though.

While we were eating these I asked Brad why he would want these instead of regular waffles and while he couldn't put his finger on it he was adamant that these were better.  They have a slight sourness that comes from the yeast that makes them feel a lot more substantial and delicious.

Belgian Waffles
3 cups warm milk
1 envelope (2 1/4 tsp) active dry yeast
3/4 cup butter, melted and cooled to lukewarm
1/2 cup sugar
3 eggs
2 tsp vanilla
1 1/2 tsp salt
4 cups all-purpose flour

Whisk together yeast and milk and let stand until the yeast is dissolved, about 5 minutes, then stir until smooth.  Whisk in butter, sugar, egg yolks, vanilla and salt.

Add flour in 3 additions, beating with a large spoon until smooth after each addition (I used my Kitchen aid).

Cover tightly with plastic wrap and let rise at room temperature until doubled in volume, 1 to 1 1/2 hours.  Stir to deflate batter.  Beat egg whites until soft peaks form and stir into batter.

Scoop onto waffle iron and cook until golden on each side.

Here's what your batter looks like when it's all ready (or in my case half gone)

And dropped onto my iron.  Belgian waffles are so big that I never fill up the entire iron, it means we don't end up with perfectly square waffles but I don't care.

And here's a waffle, cooked and ready to be eaten

Now it's bathed in syrup.

Ideally I think you'd eat this with whipped cream and strawberries but I have a crazy husband, it doesn't matter how many topping options you give him he'd still choose just plain syrup.  It never seems worth the effort to whip the cream for just me.

My Dad tried these in their regular waffle iron so even if you don't have a deeper holed Belgian iron you can still enjoy these


Linking to Share a Meal Monday

Monday, November 29, 2010

Cajun Chicken Pasta - SAMM

I know I'm supposed to announce my giveaway winner today but I've been recovering from our very full weekend so that will have to wait until tomorrow.  I didn't participate in SAMM last week though so I wanted to make sure I linked up a recipe.

Brad made this meal for me on our first Valentine's Day together and it was so delicious it's stuck around.  We've made it for family and after tasting it they've all added it to their favorite meals as well.  It's also one of those recipes that I read and I'm uninspired thinking it's going to be an average meal but it surprised every time that it's so delicious, I always think it's something you would eat at the Olive Garden.  It's yummy with some good bread too.

Cajun Chicken Pasta
4 oz linguine pasta (I use spaghettini)
2 skinless, boneless chicken breast halves
2 tsp Cajun seasoning
2 tbsp butter
1 red bell pepper, sliced
1 green bell pepper, sliced
4 fresh mushrooms, sliced (I always skip them because I hate mushrooms)
1 green onion, chopped (I usually skip these too because I don't have them and I don't notice a difference)
1 cup heavy cream
1/4 tsp dried basil
1/4 tsp lemon pepper
1/4 tsp salt
2 cloves garlic
1/8 tsp ground black pepper
1/4 cup grated Parmesan cheese (the good stuff, not that horrible Kraft stuff)

Bring a large pot of lightly salted water to a boil. Add pasta and cook for 8 to 10 minutes or until al dente; drain. Place the chicken and the Cajun seasoning in a plastic bag and shake to coat  (I never do the bag thing, I season one side and then place my chicken in the pan season side down, and season the other side.  Just be generous with the Cajun seasoning and it'll be yummy).  In a large skillet over medium heat, sauté
the chicken in butter or margarine until almost tender (5 to 7 minutes).  Add the red bell pepper, green bell pepper, mushrooms and green onion. Sauté and stir for 2 to 3 minutes.  Reduce heat.

Add the cream, basil, lemon pepper, salt, garlic powder (put real garlic in with the green peppers and skip the powder) and ground black pepper.  Heat through.  Add the cooked linguine, toss and heat through. Sprinkle with grated Parmesan cheese and serve.

Linking to Share a Meal Monday

Tuesday, November 23, 2010

Spirit of Christmas Popcorn - SAMM

Brad and I have a thing for popcorn, you might call it an addiction really.  We love it and eat it almost nightly.  We use a Stir Crazy oil popper and butter/salt flavouring to get popcorn that is just about better than theater popcorn.  We don't usually make any sort of candy popcorn because we love buttered so much but for this recipe I made an exception.  It's gingerbread flavoured popcorn which sounds odd but is just so yummy.  It was the perfect thing to bake today while it's super cold outside.  The popcorn bakes so it's crispy and sweet and delicious.  It's easy so you should make some too, it would make a great gift for neighbors or friends.

Spirit of Christmas Popcorn
16 cups popped popcorn
2 cups packed golden brown sugar
1 cup butter
1/2 cup fancy molasses (I used cooking molasses because it's what I had, it was delicious)
1/2 cup white corn syrup
1 tbsp ground ginger
1 tsp cinnamon
1/2 tsp salt
1/2 tsp baking soda

Line a large roasting pan with non stick foil.  Place popcorn in prepared pan.  Combine next 7 ingredients (brown sugar through salt) in a heavy Dutch oven.  Bring to boil over medium heat, stirring frequently.  Boil, without stirring, for 5 minutes.  Remove pan from heat and immediately stir in baking soda.  Mixture will foam vigorously.  Immediately pour foaming mixture over popcorn and stir to combine.  Bake at 205"F, stirring every 20 minutes, for 1 hour or until popcorn is glazed and crisp.  Cool in pan on a rack.  Store in an air tright container in a cool dry place for up to 1 week or freeze for up to 6 weeks.

Note: 1/2 cup unpopped popcorn = 10 cups popped popcorn

I realize this isn't a Meal, nor is it Monday but I'm going to link this to Share a Meal Monday anyway.

Monday, November 15, 2010

Taco Salad - SAMM

I realize you probably read that title and thought that there's no way you need a recipe for taco salad but just keep reading.

For the past month or so I've committed myself to making one new recipe a week.  My menu had become really stale and I was just repeating the same recipe's over and over, even if they're yummy ones excessive repeats just diminish they're deliciousness.  I find recipes online sometimes but mostly I've been pulling out cookbooks I haven't used in ages and flipped through them once again choosing recipes that perhaps I skipped over the first time.  This new recipe experiment has been mostly unsuccessful so far, just about every new recipe I've tried has been average or below average until today, I finally found one that will make it's way into permanent rotation.

This recipe comes from a little Pillsbury book I got who knows when, it's called Casseroles & Slow Cooker Meals.  I was looking for a Sunday meal and lately I've been enjoying the slow cooker, especially on Sunday it's nice to come home to a cooked dinner.  I saw the taco salad recipe and thought it would be perfect because I love taco salad and since I did all the prep in the morning it would feel even easier than it already was.  This recipe is awesome and may become our new go-to taco meat.

Here's a picture of the meat all cooked.  I know it doesn't look great because it's a pot of meat but trust when I say it's so good.  I hadn't ever put beans in my tacos before but I love the extra texture and substance they add.


Make-Your-Own Taco Salad
1 lb ground beef
1 pkg taco seasoning mix
1 can (16 oz) tomato puree (does this mean crushed tomatoes?  That's what I used)
1 medium onion, chopped
1 can (16 oz) pinto beans, drained and rinsed
1/8 tsp pepper

So you put it all in the slow cooker breaking up your meat before you add all your other ingredients and give it a good mix.  Cover and cook on high for 3 hours or on low for 6-8 hours.

Once it's done you plate with whatever you'd normally have on taco salad.  We had lettuce, tomatoes, cheese, salsa, sour cream, avocado and corn chips.


Linking to Share a Meal Monday

Monday, November 8, 2010

Pulled Pork Tacos - SAMM

I know there has been a serious lack of posts lately but like I mentioned I really had run out of projects.  It's not that I've been doing all this stuff and not linking it, I haven't been crafting at all except for one easy Christmas present that I can't link or I ruin the surprise.  I do have some fun things coming though.  If KD ever gets me her car seat I really will re-cover it, I'm gearing up to work on my first High Chair re-cover and I've decided to sew along with Jill and make this awesome advent calendar.  We had one growing up that was similar and we loved it, would fight over who got to put the numbers up, hopefully Catie enjoys it too (maybe next year though, she's pretty little).

Today is Monday so time to link up to Michelle's SAMM (Share a Meal Monday)
I'm linking a staple recipe in our house that is seriously yummy and easy, easy.

Pulled Pork Tacos


This is a slow cooker recipe so into the bottom you toss the following ingredients.  An onion, chopped, 2 Anaheim peppers, chopped (the recipe calls for Pablano but I can never find them so we use Anaheim instead, don't worry they're not spicy). 2 Tbsp Worcestershire sauce, 2 Tbsp lime juice, 3 garlic cloves, smashed and 1/4 cup of chopped cilantro.  I don't measure any of those ingredients though, this is almost no fail so I just eyeball everything.

Once that's done (or in my house, I do that while Brad does the rub) you're going to mix up the spice rub for the pork.  I won't list all the spices here because they're below but one note, it calls for Emeril's Essence spice mix.  I don't know about you but I don't have that handy so I Googled it and found a recipe, I included that below as well.  The first time I made this rub I just looked at the ingredients for the Essence, crossed off the ones I'd already mixed together and threw a little of those new ones in.  Now that we make this so often I actually mixed up a big batch of Essence and just use the 4 tsp like the recipe calls for.  Both ways were delicious though.

Once your rub is all together you just do what the name suggests, rub it all over the pork.  Cover all the sides well (before you rub you can trim some fat if there is lots, mine was pretty good so I didn't bother).  You could also choose to sear the pork once it's rubbed, I've done it before and honestly didn't notice a difference in flavour but you might and I'm sure it's what professionals would recommend.  Put your roast on top of your chopped stuff and cook for 4-6 hours on high.  I usually do all of that the night before so the rub can soak in really well.  Then the morning of you can just remove from the fridge and turn the slow cooker on. .

Here's what it looks like all ready to cook.

So I had great intentions to take pictures all the way though and show what the roast looks like after it's cooked but before removed from the crock pot but I forgot.

This roast was a big one and only took 5 hours to cook, you know it's done because it will flake apart really easily with two forks.  I also like to check on it halfway through and rotate the pork so all that yummy rub mixes with the juices.

So once it's done your remove the pork and shred it with two forks then toss it back in the slow cooker with all the juices and you're ready to serve.

(this picture doesn't do them justice, it's so yummy.  I just ate them for dinner and this post has made me want more)

Take flour tortillas and top them with your pork mix and everything you would normally put on a taco.  A warning, these can be pretty messy.  We served them to company we don't know that well so I removed most of the juices and just made the mix moist but it wasn't nearly as good, I put all the juices back in our leftovers.

This recipe makes a lot.  We ate it with another couple and then ate it for lunch the next day, lunch and dinner the day after that and put the remaining in the freezer because there was still tons left.  We also felt like our tortillas were starting to dry out and we were out of lettuce so on the last day of leftovers we made it into quesadillas instead and it was AWESOME.

It's fun because it's a new variation on tacos that's just as easy.


Pulled Pork Tacos

4-6 pound Prok Butt or Shoulder (I usually grab the biggest one they have)
2 Poblano Peppers, roughly chopped
1 large Onion, yellow, roughly chopped
2 tablespoon Worcestershire sauce
2 tablespoon Lime Juice
3 cloves Garlic, smashed
1/4 cup Cilantro, chopped
4 teaspoon Salt,
2 teaspoon Pepper, black, divided
4 teaspoon Cumin, divided
4 teaspoon Emeril's Essence or similar spice mix, divided

Emeril's Essence
2 1/2 tablespoons paprika
2 tablespoons salt
2 tablespoons garlic powder
1 tablespoon black pepper
1 tablespoon onion powder
1 tablespoon cayenne pepper
1 tablespoon dried leaf oregano
1 tablespoon dried thyme

To the slow cooker add onion, garlic, poblano peppers, Worcestershire sauce, lime juice, and cilantro. Season each side of the pork with half the seasonings and place in slow cooker, fat side up. Cover and slow cook on high for 4 to 6 hours until tender. Before serving, remove as much fat as possible from the pork then shred with two forks.

Warm flour tortillas in microwave and top with pork, lettuce, tomato, cheese, sour cream, avocado and salsa.  You can also squeeze some extra lime on top and some chopped cilantro.  Wrap and serve.


Linking to Share a Meal Monday

Tuesday, November 2, 2010

Sharp Rotini Mac & Cheese - SAMM

I know, I'm a day late for SAMM (Share a Meal Monday) but yesterday I could not get motivated to do anything.  I didn't want to go without sharing one of our favorite meals though.

My Mom loves Macaroni and cheese, not Kraft Dinner but good, homemade cheesy mac and cheese.  It's probably because of her love that I've known how to make a really good cheese sauce for as long as I can remember.  I've made a bunch of different variations on the classic but this one easily stands out as our favorite.

I haven't actually made it in a while so there won't be any pictures but it's super yummy and you should give it a try.

Sharp Rotini Mac & Cheese

2 cups rotini pasta
3 tomatoes, diced
4 strips of bacon, fried and crumbled
2 green onions, finely sliced on an angle (they're prettier on an angle)

Sauce:
2 tbsp butter
2 tbsp all-purpose flour
1 1/2 cups milk
1 1/2 cups chicken broth
1 tsp of dried mustard
Salt & Pepper to taste
2 cups extra aged cheddar cheese, grated (it's a white cheese)

Cook your pasta according to the directions, while it's cooking make your sauce.

Heat a pot over medium-high heat. Melt butter and add flour and whisk well. Season with salt, pepper and mustard and let cook a minute. Whisk in milk and broth and bring to a boil (you could use all milk but the broth makes it a little lighter and less fatty).   Lower heat and add cheese, stirring to melt.

When your pasta is done drain and I like to add my green onions immediately to the hot pasta so it has some time to wilt. Stir in your tomatoes, bacon and add your cheese sauce.  I like to save the bacon until the last minute so it stays yummy and crispy.  Once everything is mixed go ahead and enjoy.

You could also pour it into a casserole dish, top with breadcrumbs mixed with melted butter and bake until they're nice and golden (about 20 minutes) but I can never wait to eat and so we always skip this step.

This picture doesn't show the bacon, tomatoes or onions but other than that it's pretty close to the end result.

Linking to Share a Meal Monday

Monday, October 25, 2010

Parmesan Pesto Pizza - SAMM

Time for another round of SAMM (Share a Meal Monday).  You should go link up to Michelle's blog, it's fun and you might find a recipe or two you like.


This week we made one of our favorite meals and probably the best dish I've ever created on my own.


Doesn't it look yummy?  I was too excited to eat it so I forgot to take a picture before I cut it... oops.


Here's what you do.


Make up your favorite pizza dough recipe.  I'll give you mine at the end of the post even though I don't think it's that great.  It turns out pretty good but it's not very good leftover, it gets kind of tough.  I'm sure there's a better one out there and if you have one you should give it to me.


One your dough has risen and is ready to go roll it out to fit your pan.  I use a pizza stone and you should too, they make such a good crust.  There was a time when Brad and I discovered BBQ pizza and we thought it was the best thing ever.  Then one day we were out of propane so we decided to use the stone we got as a wedding gift, turns out the stone was much better and way less work.  They're really cheap so you should get one.


So roll out your dough and then spread on top some pesto.  You could make your own and I'm sure it would tase even better but that adds a lot of cost and time and dishes and the point of pizza is easy and yummy so I use a prepared pesto.


This one to be exact.


Once your pesto is spread, top with some tomatoes.  I use vine ripened because I think they're yummier than hot house and I think they look prettier when they're sliced and layed on top but they're a lot easier to eat and you don't need as many if you dice them.  Top your tomatoes with a generous amount of crumbled feta.  I don't crumble it very finely because I think the big chunks.


The next and last ingredient is the most important, the Parmesan cheese.  If you use that horrible bottle of kraft powdered cheese you will completely ruin this pizza, you may as well just not bother making it.  And that pre-shredded stuff isn't much better, it really is worth it to spend the extra money on good, Parmigiano-Reggiano cheese.  It makes a huge difference and you will not regret it, despite the price tag (usually you find it in the deli section with the specialty cheeses).  There aren't many ingredients on this pizza so it's important that they're all really good ones.


Once your pizza is dressed it looks like this (You should try to spread your ingredients further to the edge than I did on this pizza.  You can see there's a ring of pesto with nothing on it near the crust and I was disappointed while I was eating that there wasn't any good stuff there).


Now technically when you use a pizza stone you're supposed to pre-heat the stone.  I've done it once and didn't notice any difference except that it's a pain to deal with a hot stone so I don't bother.  I put the pizza in a hot oven, 375 ish and bake until it looks good, maybe 15 minutes to 30 minutes?  Sorry, I don't ever time it, you want the crust to look slightly brown and the feta should look yummy and browned in places too.


This is an easy meal that we love, maybe it will become one of your favorites too!


Pizza Dough

1 1/4 cups water 
3 cups bread flour (I always use all purpose)
2 tsp active dry yeast 
1 1/2 tbsp white sugar 
1 tsp salt 
1 tsp powdered milk (I used milk once and I didn’t like the texture difference)


Place ingredients in the pan of the bread machine, in the order suggested by the manufacturer. Select Dough cycle. After cycle is completed, roll out dough on a lightly floured surface. 


My bread machine died so instead I put all the ingredients in my Kitchen Aid and knead using the dough hook until it looks done.  Then I spray my bowl with olive oil and cover with saran for a couple of hours.  Or sometimes I pop it in the fridge and let it rise overnight.