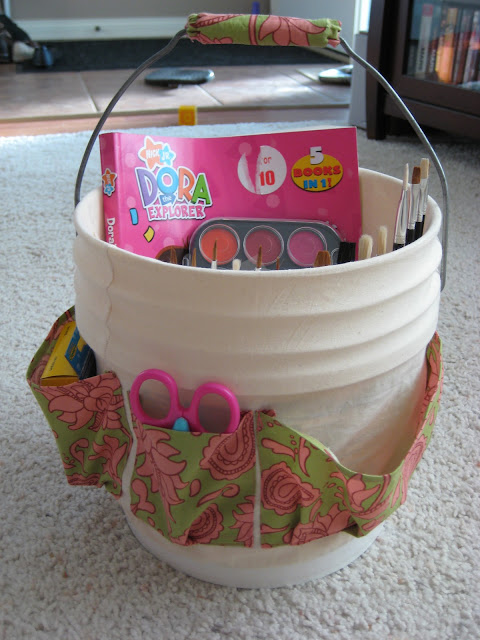
As promised it's Tuesday so time for the second half of my gift that I'm so excited about. I didn't get a comment from the person this is going to so I'm going to assume I'm not spoiling anything. The first part of this gift is the art smock that you can read about here, that part of the gift will be included in the awesome art bucket that I've made.
This bucket will hold all of the cute girl's art supplies so when it's time to craft you can just pull out the bucket and she's good to go. There are pockets all around and most of them are empty just waiting to be filled. I got the idea here at a blog called Kotori. She used a bucket tool belt but I wanted mine to be a little cuter and the belt was a little more than I was willing to spend.
One quick side note... I called this a light tutorial because I had a very sad thing happen while crafting this project, I filled up my Picasa storage space. For those of you unfamiliar, Picasa is the site that automatically stores all of your blogger pictures. Once your space is gone you can no longer add photos to your blog posts and you need to buy more space. I've been really un-happy about my free hobby suddenly costing $5 a year (I know, it's only $5). I was a little poutty about it so I just didn't take photos during my creation of the bucket, sorry. I have now come to terms with the necessary $5 (unless you have an awesome suggestion for me) so the many photos can continue on future posts. On to the tutorial...
Here's my bucket, naked and ready to be re-used.
I used a plain canvas type fabric for my cover and I started by tracing around the bottom of my bucket and then adding some seam allowance. I also cut a rectangle that was wide enough to fit around the widest part of my bucket. I made sure it was long enough to extend from the bottom of the bucket up to the top, over and down to the bottom again.
I sewed up the sides of my rectangle and slipped it inside my bucket to see how it fit. I wanted the cover to fit nice and snug so I checked the fit a lot. I thought a rectangle would work well because my bucket seemed really straight up and down, I was surprised just how much I ended up needed to cut off my original rectangle though, the slant was subtle but definitely there. I placed the fabric in my bucket and then pinned the excess fabric so I could move my seam in where necessary. I did this a bunch of times until my cover finally fit how I wanted and then I cut the excess fabric off the width leaving my length the same.
I would do one thing differently next time, the circle is going to fit the inside of the bucket which is smaller than the outside of the bucket which meant my circle was too big and I had to trim it, next time I would trace the outside and not add any seam allowance. That extra size on the outside will become the seam allowance and the circle will fit the bottom.
I next pinned my circle onto my tube of fabric and sewed it together (a photo!)
At this point it looked like this.
I wanted the cover to stay snug on the bucket so I made a casing at the bottom and inserted some wide elastic. I pulled the elastic as I went so everything is cinched into place. You can see in the picture above the little hole where my handle goes (I removed it before I started), I marked that hole and then made a button hole. I did the same on the other side so my handle could slip back into place (but I didn't put the handle on until my pockets were finished).
From this point I made my paintbrush pockets on the inside of the bucket (such a pain but it's like making a crayon roll), I then put pockets on the outside. I made my pockets poof out a bit by not sewing them flat, I would pin one side and then lay the pocket flat but before pinning I'd move the second side an inch or two closer to the pinned side. I'd make a little pleat on the bottom to give it the space to put stuff inside. I did that all the way around the bucket making as many pockets as I had room.
Here's what I filled the pockets with (this little girl LOVES Dora)
I also plan on making some homemade play dough but I can't do that until closer to Christmas. The art smock will slip in the bucket as well. I've left plenty of room for supplies she already owns.
Here are some more pictures of the completed bucket (I added a few things to make it look more full).
I think the paint brush pockets are my favorite part and I just hope this Mommy and little girl enjoy it.
I'm going to link up to these fun parties and this one
 .
.


1 comments:
That is awesome. I love the paintbrush pockets, too!
Post a Comment