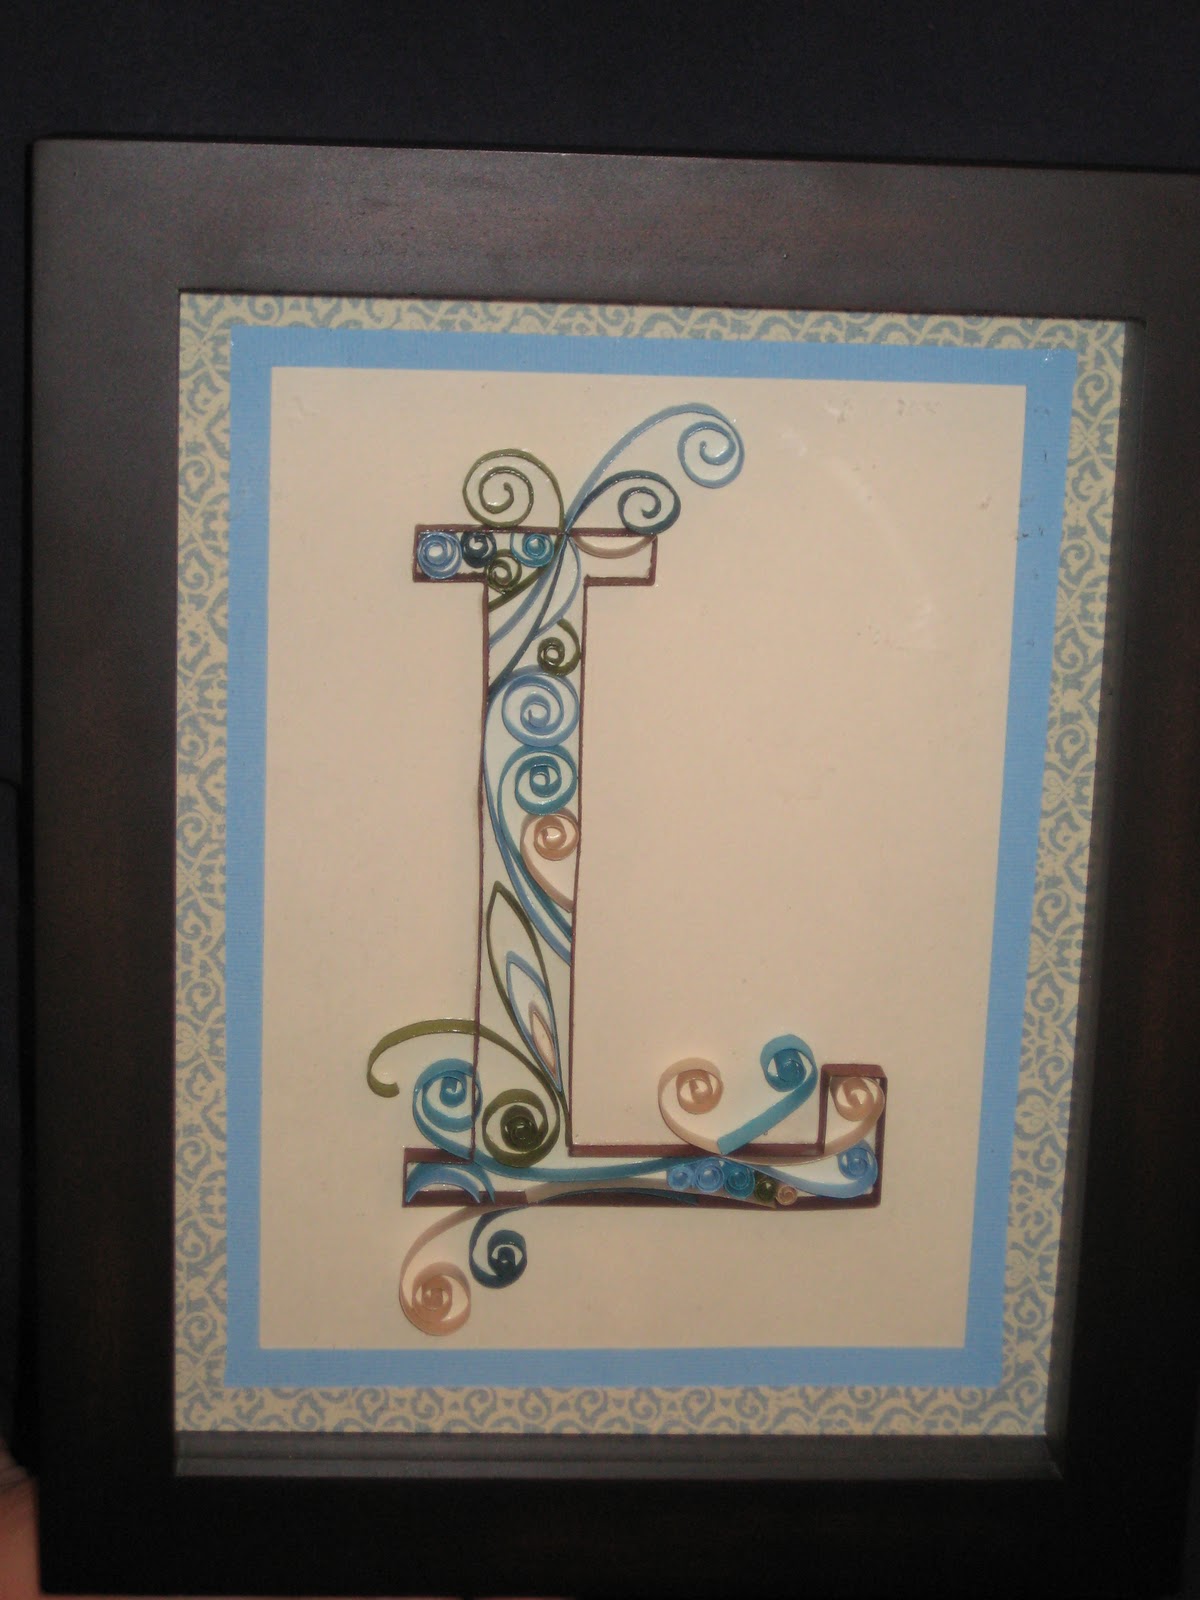
I finished Sara's Quilled monogram (she was the winner of
the giveaway) and I dropped it in the mail on Saturday so here's a preview for her and a tutorial for all of you. I hope Sara loves it as much as I do. I feel like this picture doesn't really do it justice, it looks so great in person.
Before we get started I have one small disclaimer... the paper I used as the backing for the letter was pretty light in colour and I do all my quilling in the evening after Catie goes to bed. This means all my photos are taken at night so I need a flash but the flash bounces off the paper so most of them look pretty terrible. I did my best but some of them are really awful, I apologize. I took more photos of the steps than these but some of them just aren't usable.
To start here is a photo of your needed supplies

- You need a picture frame that is really deep, the letter is going to end up being at least a 1/4 of an inch tall so there needs to be room for that or you can leave the glass out. I personally prefer the look of glass. I found my frame at Winners for $7.99. For my W I found this square frame at Liquidation World for $8.99. You can get these deep frames at Michael's too but they're about $20 and that's after a 40% coupon.
- I use Mod Podge as my glue. It dries clear and is really easy to work with.
- You need some sort of paper cutter so you can cut your strips. Apparently you can buy already cut paper specifically for Quilling but I'm not willing to pay for that.
- You need some paper to work with. The light colour on top will be the background for the L. The brown will outline the letter, the green and the blues will make the coils to fill in the letter and the patterned piece on the bottom is for the matte. After I started I decided I needed one lighter colour too so I added a light browny paper.
- These are the tools I use, there is a needle (it's a big one), toothpicks, Q-tips and a chopstick. You can also buy a quilling too, it's basically a needle with the top chopped off.
- These are tools you'll use throught the process, a ruler, a paintbrush (mine is actually a makeup brush but it works), a pencil, and an exacto knife.
- You'll use a glue runner at the end to assemble the matte.
- I forgot to show in this picture some tweezers. They are super helpful and I use them a lot.
To start you need to print off your letter so you have something to follow. I use Microsoft Word, type my letter and then scroll though the fonts until I find one I like, although I've always ended up using Lucida Fax. Make sure you change the style to outline. Using my frame size I decide how big I want the letter and size it accordingly. Then I change the colour to be really light grey so you can barely see it once it's printed out, you want it to almost disappear on the page. This picture shows just how light it is, you can hardly see the L.
Next you're going to cut out your strips of paper. Measure 1/4 inch strips and cut them, you want to be really precise here making sure they're all straight and exactly 1/4 inch. I cut all my colours at once but I only cut this many before I was sick of measuring, I thought I would need way more but in the end I didn't need any extras, I did use all of these though.
To outline your letter take one brown strip lay it on top of your print out. You're going to measure from one corner to another and make a pencil mark. Using the pencil mark carefully bend your paper so you have a nice clean, straight bend (I bend the paper on my ruler).
Once you've made your first bend carry on measuring, marking and bending until you've used up an entire strip of paper. One strip of paper obviously isn't going to go around the entire letter, where you're two strips of paper meet make sure it's at a corner, it's much easier to hide.
Here's my first strip bent but not glued down.
next you're going to put a blog of Mod Podge on some sort of surface (I used an empty cracker box but paper plates work well). I dip a Q-tip in the glue and then pick up the strip of paper and apply the glue to the bottom edge. Your strip is pretty long though and if you put glue on the entire edge it's difficult to get it all down before it dries so I work in small sections. On this one I put glue on the top of the L but not extending down the length of it (I hope this is making some sort of sense). Once it's glued you carefully line up your cut paper with your printed template, you want to be really precise here too. Press the glue down and hold for a second, it doesn't take long to dry. Once the first part is down I switch to a toothpick, dip in glue and carefully move your unglued paper out of the way. Apply glue to the template down the line and then attach your paper. Do this until you're strip is all glued down.
See the little dobs of glue? Don't worry, they disappear when dry.
Then you can go ahead and measure, bend and glue your next piece until you've gone all the way around. I needed two and a little bit. Make sure to glue the edges where your two strips will meet so they are attached to each other.
Now it's time to fill in that letter.
I don't really plan ahead here. I suppose you could sketch out what you wanted to do but I don't. I did know before I started that I wanted some big curls coming off the top of the L and I wanted 3 curls coming down. I also wanted one corner full of tiny curls. I did those ones first and then filled in the rest as I liked. I like lots of curls but not enough to be overwhelming.
Take a strip of paper in the colour of your choice (not brown though, we're done with that) and you're going to wind it around an item. Here's where you need the toothpick, needle and pen. I use the toothpick 90% of the time because it's easier but the needle gives a tighter curl in the centre so sometimes's it's useful, especially if you're working on a small curl. I read once that you're suppose to slightly wet the end of your paper to help turn, I hope it doesn't gross you out to learn that I actually just use my tongue on the end a little. Press the end around the toothpick to give it a little bend and then wind around a couple times. The amount of times you wind depends on the size of the curl. Once you take the toothpick out you have a curl that stops pretty suddenly, the tail that you didn't wind has no curl at all, like in the diagram below.

You want the tail to have more of an arc so I use the pencil here to help give it some shape, just slightly bend it around the pencil. Before you cut your tails off hold your paper up to your letter to make sure it fits and then mark with your pencil and cut. Glue like you did before and hold until it's dry (the tweezers really help you fit everything in). If there is going to be a cluster of curls together I like to line them all up before I glue any of them.
Here's a couple of views of mine in progress.
And here's the finished L
Once you've glued all of your paper down take your paint brush and lightly brush glue over the entire letter to secure it. You want to be careful here because if you get little blogs of glue you can see them a little at the end, they look extra shiny. Try not to get blogs stuck in the corners.
Now it's time to frame. I use the back of the frame as a template for my patterned paper and cut out a rectangle. Then you need to cut out the centre. To decide the size I roughly measure my letter (curls and all), this one was about 4"x6". My Frame was 7"x9" so I decided I'd make a 1/2" patterned border with a 1/4" trim. I measured down that amount on all sides of my rectangle and connected the lines to make a rectangle inside my original. Then I use a straight edge and exaco knife to carefully cut out the centre rectangle. You're left with this (minus the blue trim, sorry).

For the trim I cut out 4 strips 3/4" thick. I cut them to length and then used a 45 degree ruler to give them that mitered look. I only cut 1 end of each diagonally because the straight edge will tuck under. I cut them 3/4" thick because I can then line them up with the edge of the frame to make sure they're straight. The paper left sticking out is 1/4" like I wanted. Here are two of my pieces cut, and two of them glued already. This is where you use your glue runner.
I like to cut my letter to size last and I just eyball it. I place it underneath my frame, line it up and then cut it to size. Glue it to the frame, re-assemble and it's finished.
I keep wanting to declare this one as my favorite yet but they're all so pretty that I'm not sure there can be a favourite.
You should all check out
this link, it's where I saw the original idea. She also gives a tutorial and her H is beautiful.
Yay, I've been featured!